Instrument loom repair.
Posted: Fri Jan 25, 2013 8:36 am
The idiot lights on my 11/1981 R100RS haven't worked correctly for ages. The OIL & GEN lights have always worked thankfully, but lately they've become temperamental and very sensitive to the position of the plug. Time for action.
I planned to substitute the instrument plug and 8inches of wiring for one in better condition. I believed the wiring was the culprit, not the plug.
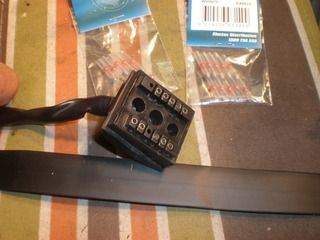
Assembled the stuff required.
1. Connectors with solder within them.
2. Scissors
3. Crimper/wire stripper.
4. Heat shrink tubing.
5. Stiff outer protective sheath.
6. New (used) plug and wiring.
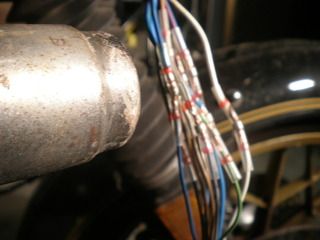
Opened up the old cover, exposing the old wiring.
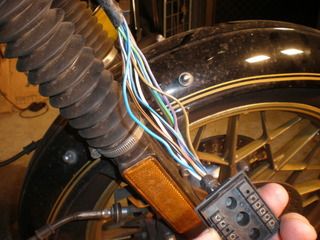
Cut the old wiring. The point of no return. Committed.
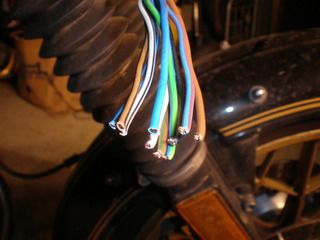
With a small degree of staggering, I connected the 10 wires via these butt connectors that have solder internally. The finishing heat shrink was over the loom ready to move into position and the connectors were placed onto one wire before they were connected, to be slid over the connection when ready.
The wire width on the new bits were a smaller gauge than the original loom. The wires were stripped and the ends carefully interlocked before the connector was moved into position. Note the different sizes of the wiring.
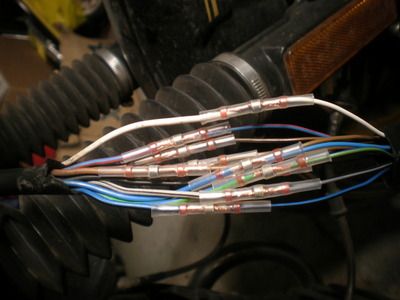
When all 10 were done, the heat gun was used to melt the solder...despite this next picture, the wires were held horizontal for that exercise to enable an even spread of the solder melt.
The new outer heat shrink was moved into place...
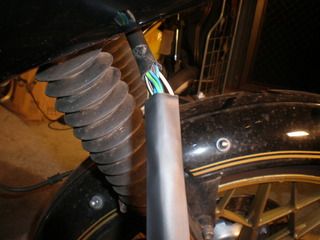
...then I tested the lights before the final shrink.
They all worked...
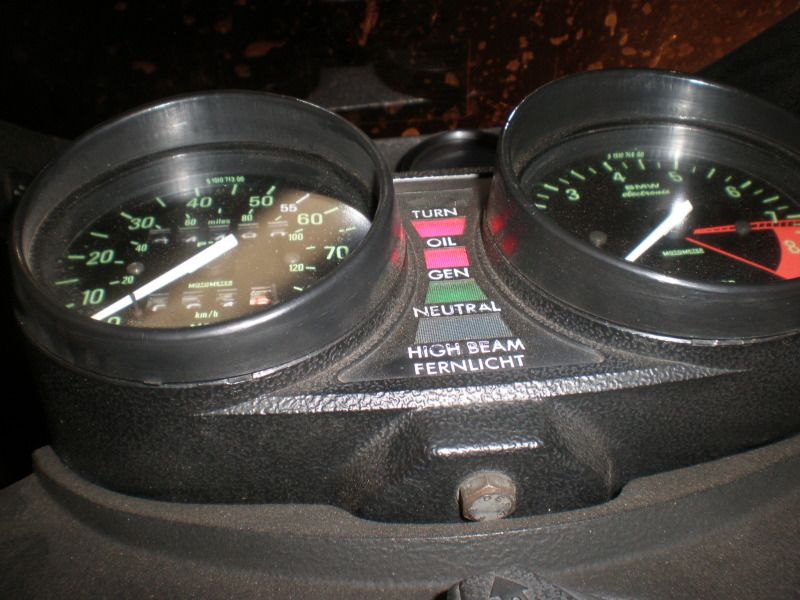
Now I'll be able to see the instruments at night.
This was quick and easy. Eventually I'll replace the whole loom, so this repair doesn't need to last forever.
I planned to substitute the instrument plug and 8inches of wiring for one in better condition. I believed the wiring was the culprit, not the plug.
Assembled the stuff required.
1. Connectors with solder within them.
2. Scissors
3. Crimper/wire stripper.
4. Heat shrink tubing.
5. Stiff outer protective sheath.
6. New (used) plug and wiring.
Opened up the old cover, exposing the old wiring.
Cut the old wiring. The point of no return. Committed.
With a small degree of staggering, I connected the 10 wires via these butt connectors that have solder internally. The finishing heat shrink was over the loom ready to move into position and the connectors were placed onto one wire before they were connected, to be slid over the connection when ready.
The wire width on the new bits were a smaller gauge than the original loom. The wires were stripped and the ends carefully interlocked before the connector was moved into position. Note the different sizes of the wiring.
When all 10 were done, the heat gun was used to melt the solder...despite this next picture, the wires were held horizontal for that exercise to enable an even spread of the solder melt.
The new outer heat shrink was moved into place...
...then I tested the lights before the final shrink.
They all worked...
Now I'll be able to see the instruments at night.
This was quick and easy. Eventually I'll replace the whole loom, so this repair doesn't need to last forever.