Woo Hoo! A Big Project!
Re: Woo Hoo! A Big Project!
Updates coming tomorrow! Yesterday and today were shopping, setup, and design. I expect it will look wicked slick when done, using existing mount points and wiring as much as possible. I'm speaking here of mounting the starter relay and adding a horn relay for best power to the Fiamm.
Call me Mel. Some years ago- never mind how long precisely- having little or no money in my purse, and nothing particular to interest me at home, I thought I would ride about a little and see the other parts of the world.
Re: Woo Hoo! A Big Project!
Moto budget discussion a moderate success! I can proceed at an out of pocket pace, and my pocket has been enhanced.
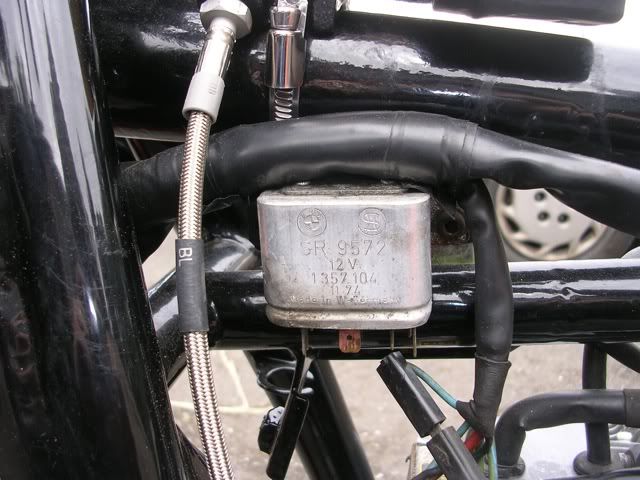
Today, more fun mit electrons. In the last installment, I discovered I can replace this $100 part:
With this $15 part:
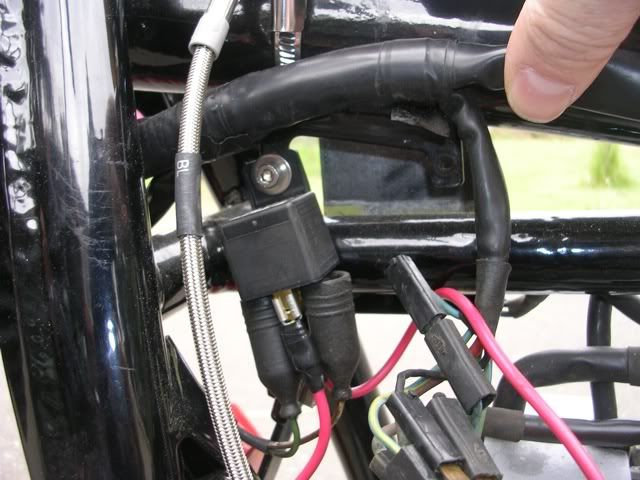
I will have two of these Bosch relays on Monday, one for the starter and one for the horn. Just go to your VW FLAPS and ask for a starter booster relay. Note that they have a mounting point on top that can go right to the fittings already on the frame. About the horn--PO had installed a Fiamm, mounted to some of the fairing hardware, with a domestic relay of some kind in place, taking the hot right off the battery with an inline fuse. Trying to keep it all DIN, I replaced the wire with a red wire, the relay with the Bosch piece and got lucky (had to work at it) taking the ground through the chassis. I had to get a new inline fuse--when I peeled the electrical tape off the old fuse holder it was revealed that it was broken in three pieces, held together with the tape. It's all tootin' happy now:
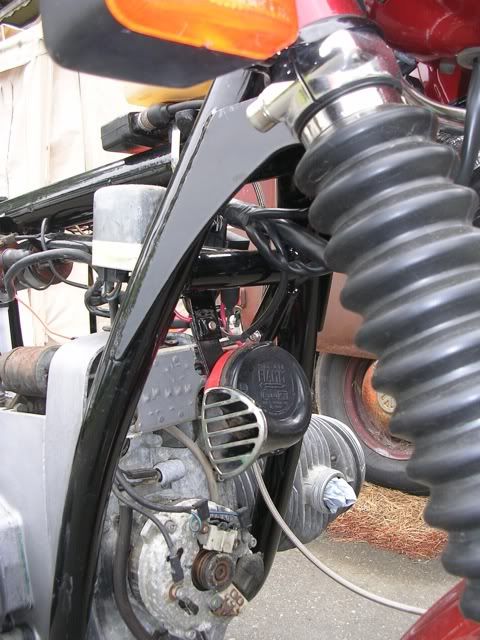
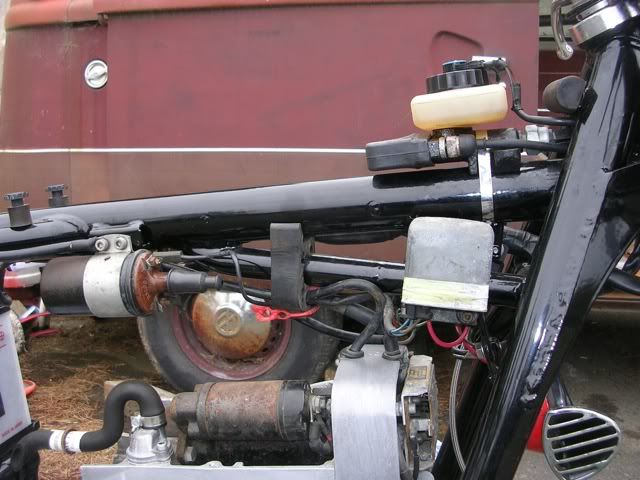
I'm a little concerned that I have to R and R the horn to R and R the front cover. How did early R90S mount their Fiamms? Did they have different mounts on the frame? After all that fun, I worked at cleaning up the wiring routing and reinstalled this rubber bit:
Then I went on to the headlight. I had test fitted it earlier but never powered it up, and it's been out while I chased other electrical demons. After making space in the shell for the lamp, where the US length handlebar switch harnesses make it kinda tight inside when Euro bars are installed, I got it popped in and found that I had a functioning parking light. I also seem to have a passing beam, but I don't seem to have a steady on low or high beam. The bike is pre-1978, and as such comes with a "Euro" light switch, like so:
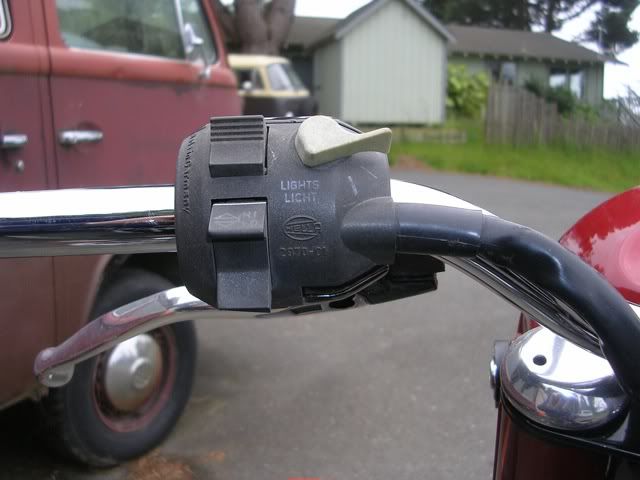
There are three positions on the switch--top looks like it says "OFF" and then there are two white lines. What should I expect for each position? The lower button is the dimmer, and it appears to work as a rocker switch. When it is held down, it appears to give high beam for as long as it's held (the "passing" beam?). When it's pushed up, shouldn't the dimmer relay get all excited? I'm getting no white hot love form the headlamp system at this point.
Today, more fun mit electrons. In the last installment, I discovered I can replace this $100 part:

With this $15 part:

I will have two of these Bosch relays on Monday, one for the starter and one for the horn. Just go to your VW FLAPS and ask for a starter booster relay. Note that they have a mounting point on top that can go right to the fittings already on the frame. About the horn--PO had installed a Fiamm, mounted to some of the fairing hardware, with a domestic relay of some kind in place, taking the hot right off the battery with an inline fuse. Trying to keep it all DIN, I replaced the wire with a red wire, the relay with the Bosch piece and got lucky (had to work at it) taking the ground through the chassis. I had to get a new inline fuse--when I peeled the electrical tape off the old fuse holder it was revealed that it was broken in three pieces, held together with the tape. It's all tootin' happy now:

I'm a little concerned that I have to R and R the horn to R and R the front cover. How did early R90S mount their Fiamms? Did they have different mounts on the frame? After all that fun, I worked at cleaning up the wiring routing and reinstalled this rubber bit:

Then I went on to the headlight. I had test fitted it earlier but never powered it up, and it's been out while I chased other electrical demons. After making space in the shell for the lamp, where the US length handlebar switch harnesses make it kinda tight inside when Euro bars are installed, I got it popped in and found that I had a functioning parking light. I also seem to have a passing beam, but I don't seem to have a steady on low or high beam. The bike is pre-1978, and as such comes with a "Euro" light switch, like so:

There are three positions on the switch--top looks like it says "OFF" and then there are two white lines. What should I expect for each position? The lower button is the dimmer, and it appears to work as a rocker switch. When it is held down, it appears to give high beam for as long as it's held (the "passing" beam?). When it's pushed up, shouldn't the dimmer relay get all excited? I'm getting no white hot love form the headlamp system at this point.
Call me Mel. Some years ago- never mind how long precisely- having little or no money in my purse, and nothing particular to interest me at home, I thought I would ride about a little and see the other parts of the world.
Re: Woo Hoo! A Big Project!
So today I finished the undertank relay tango:
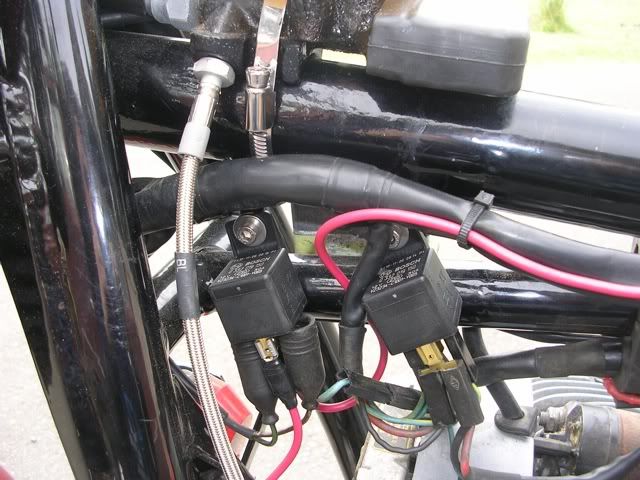
I was a little concerned about exposing the wiring when done so I put the tank on for a few minutes:
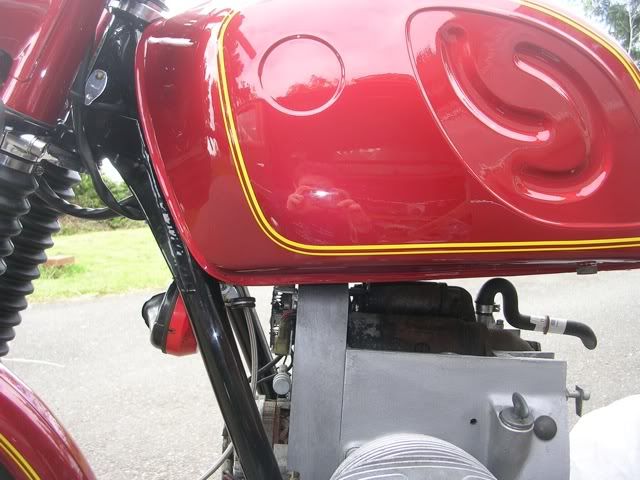
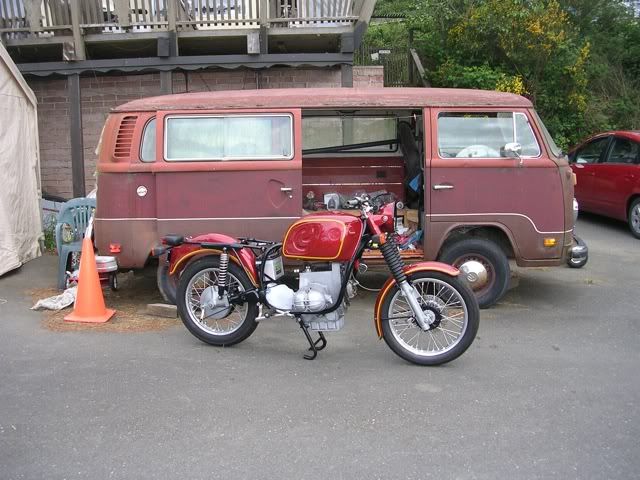
Glad to have the big tank! Took a wide shot to keep myself inspired before I had to put it away:
I attacked the headlamp issue with the wiring diagram and a multimeter. I was expecting the relevant relay to be a dimmer relay like I have on my newer (66 and later) VWs but it is actually a lights relay, keeping the full load out of the on/off switch but sending all the electrons through the dip switch. Trouble is, it's not sending any of that white hot love to the dip switch. For all the other scenarios, it's sending power as it should, but no combination of switch/key/ignition puts a charge in spade #87. The passing beam was functioning as it should because the passing beam takes its 'hot' right from the battery, independent of the light relay. So I'm relay shopping again. The genuine part runs $20ish, but I'm going to give my VW FLAPS a shot at this one, too. I'll share the results as they happen.

I was a little concerned about exposing the wiring when done so I put the tank on for a few minutes:

Glad to have the big tank! Took a wide shot to keep myself inspired before I had to put it away:

I attacked the headlamp issue with the wiring diagram and a multimeter. I was expecting the relevant relay to be a dimmer relay like I have on my newer (66 and later) VWs but it is actually a lights relay, keeping the full load out of the on/off switch but sending all the electrons through the dip switch. Trouble is, it's not sending any of that white hot love to the dip switch. For all the other scenarios, it's sending power as it should, but no combination of switch/key/ignition puts a charge in spade #87. The passing beam was functioning as it should because the passing beam takes its 'hot' right from the battery, independent of the light relay. So I'm relay shopping again. The genuine part runs $20ish, but I'm going to give my VW FLAPS a shot at this one, too. I'll share the results as they happen.
Call me Mel. Some years ago- never mind how long precisely- having little or no money in my purse, and nothing particular to interest me at home, I thought I would ride about a little and see the other parts of the world.
Re: Woo Hoo! A Big Project!
R90Ss did not have Fiammes. They had one small bagel type horn. Sorry for the food reference.
Chuey
Chuey
Re: Woo Hoo! A Big Project!
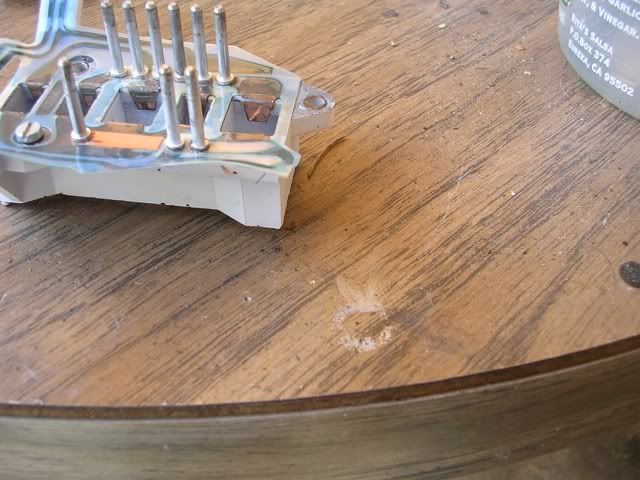
More electrical voodoo! Trying to get my instrument/idiot lights to do their thing. When I made it run a couple years ago, some of them worked. When I put it back together, nothing lit up anymore. So after checking that I had the right signals coming to the plug, I went inside the instruments to see what was up. Most of the contacts inside were corroded where the copper film inside the flexible thingy met the contacts on the bulb holders. All the bulbs were still good after cleaning (sanding) the bulb holder contacts, but I could only get continuity on a few of the runs in the flexible thingy. Cleaning helped a couple, but hurt a couple more. The contact on the right has just had a few strokes of 600 grit paper, and it has lost the copper right where it makes contact with the bulb holder. I may try to solder some wires into it, but most likely I'm going to bend over and spend the $$ to get a new flexible thingy while they're still available.
Speaking of soldering, is that the preferred method of getting the coil-end contact onto the HT spark plug leads? Any tips that you, my friends of the innerwebs, may have would be highly appreciated.

Speaking of soldering, is that the preferred method of getting the coil-end contact onto the HT spark plug leads? Any tips that you, my friends of the innerwebs, may have would be highly appreciated.
Call me Mel. Some years ago- never mind how long precisely- having little or no money in my purse, and nothing particular to interest me at home, I thought I would ride about a little and see the other parts of the world.
-
Deleted User 287
Re: Woo Hoo! A Big Project!
New parts are so nice, and the fact that they are so easily available just makes it better. If you plan to keep the bike, anyway.melville wrote: but most likely I'm going to bend over and spend the $$ to get a new flexible thingy while they're still available.
Speaking of soldering, is that the preferred method of getting the coil-end contact onto the HT spark plug leads? Any tips that you, my friends of the innerwebs, may have would be highly appreciated.
The HT wire ends - just plain old rosin-core solder. Very easy and worthwhile. Have a pair of needle-nose pliers ready for when the solder flows when removing the old one. You may need to un-bend the wire, but you will figure it out easily enough!
Re: Woo Hoo! A Big Project!
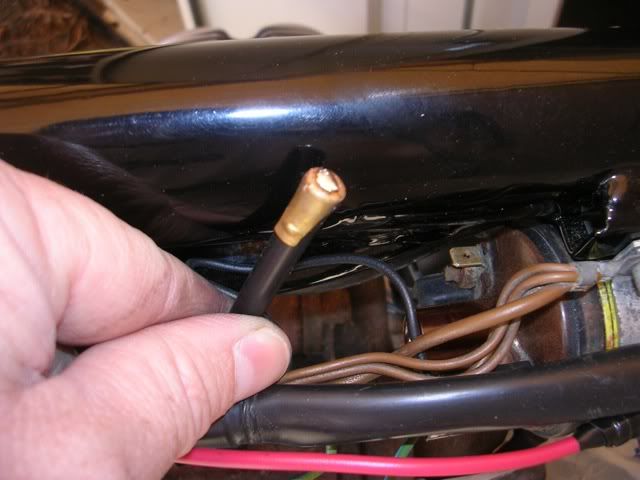
Thanks Rob! I had all new bits, including the copper bit that meets the coil. Nice to expand my horizons--VW stuff comes preassembled, so I haven't done this before. Coil end in place:
And wires installed:
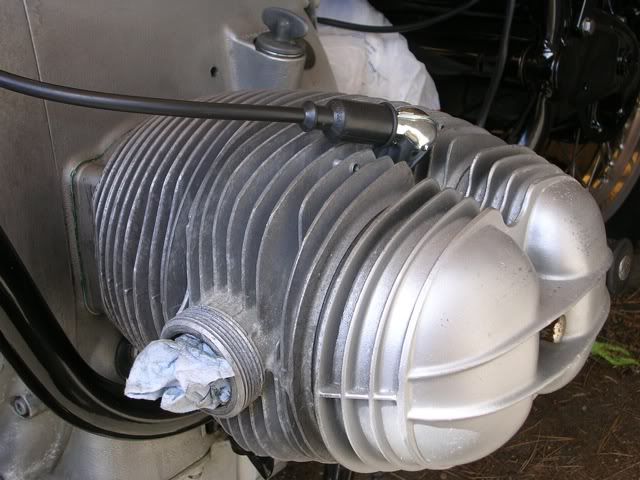
I made them a little longer than what came off so I can switch them from one side to another without pulling the tank. That seems to be a typical diagnostic step when there's trouble on one side only, might as well make it easier.

And wires installed:

I made them a little longer than what came off so I can switch them from one side to another without pulling the tank. That seems to be a typical diagnostic step when there's trouble on one side only, might as well make it easier.
Call me Mel. Some years ago- never mind how long precisely- having little or no money in my purse, and nothing particular to interest me at home, I thought I would ride about a little and see the other parts of the world.
-
Deleted User 287
Re: Woo Hoo! A Big Project!
If you want a "period modification", unscrew the caps and slide a short length of fuel line on them for where they go under the tank!
Re: Woo Hoo! A Big Project!
Oh, but I did! That wasn't factory installed?justoneoftheguys wrote:If you want a "period modification", unscrew the caps and slide a short length of fuel line on them for where they go under the tank!
Call me Mel. Some years ago- never mind how long precisely- having little or no money in my purse, and nothing particular to interest me at home, I thought I would ride about a little and see the other parts of the world.
Re: Woo Hoo! A Big Project!
Slayed a wee electrical dragon today--set the static timing, then cranked it and open-fired a plug to check for spark. Sparks were in the yellow-to-blue range, which is just fine with me given the state of the battery.
I think I'm on the verge of a breakthrough as regards the headlight and its relay and the dipswitch. If it works, it will be the slickest thing I've ever coaxed out of this voodoo electricity. More to come this weekend.
I think I'm on the verge of a breakthrough as regards the headlight and its relay and the dipswitch. If it works, it will be the slickest thing I've ever coaxed out of this voodoo electricity. More to come this weekend.
Call me Mel. Some years ago- never mind how long precisely- having little or no money in my purse, and nothing particular to interest me at home, I thought I would ride about a little and see the other parts of the world.