seat-pan progression

If you want to see a particular theme of pictures posted start a thread for it. Your pictures just MIGHT end up on the Boxerworks front page in the Gallery slideshow. That said, the RULES are as follows.....
1. try to keep it Motorcycle related please.
2. NO PORN, it can be sexy but no nekkid stuff
3. NO items for sale
User avatar
vanzen
Posts: 1438
Joined: Mon Aug 09, 2010 2:29 pm
Location: Hidin' in the Hills

seat-pan progression

Post by vanzen »

Building a seat-pan for the CRo. This is how it went ...

A Yamaha 125 TZ FRP repro piece by Air-Tech was chosen. The sub-frame was built to fit this pan:Image

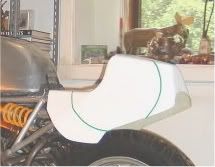
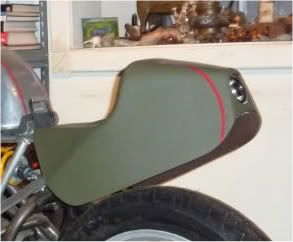
A Dremel cut-off tool was used to revise the shape, the paint is rattle-can flat-camo.
A billet 40-LED tail light intended for the chopper market was lathe modified to fit it's fabricated alloy bracket. This assembly bolts to the sub-frame allowing seat-pan removal without disconnecting any wires:
Image

Tractor tail light was in a box of items purchased at a farm auction:
Image

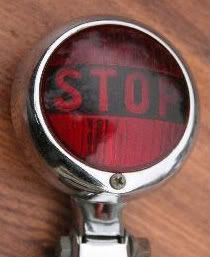
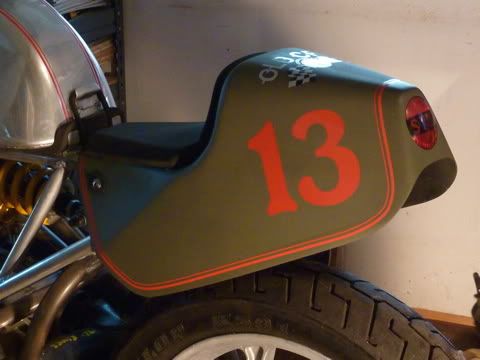
The tractor stop-lens is secured to the seat-pan with silicone:
Image

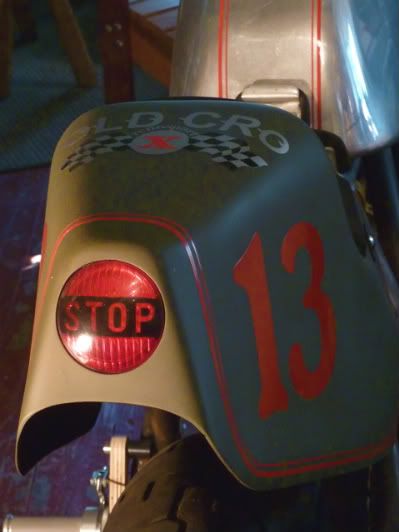
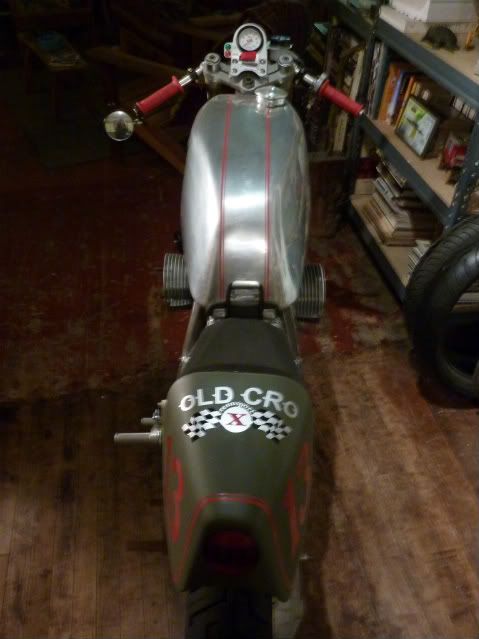
Thick-n-thin stripes, number graffix, and neoprene pads.
The neoprene was bought in a sheet, cut, carved, and sanded to shape.
Two screws remove the seat-pan from the sub-frame:
Image

From the top:
Image
Last edited by vanzen on Thu Oct 07, 2010 3:12 pm, edited 1 time in total.
Image
Garnet
Posts: 3108
Joined: Tue Aug 03, 2010 6:24 pm
Location: Victoria BC Canada

Re: seat-pan progression

Post by Garnet »

You are making headway......NICE!
Garnet

Image
Major Softie
Posts: 8900
Joined: Tue Aug 03, 2010 1:46 pm

Re: seat-pan progression

Post by Major Softie »

Very unique work. I like it.

BUT, this is an Airhead site, right? You are still running a Nohead.
MS - out
Deleted User 287

Re: seat-pan progression

Post by Deleted User 287 »

Garnet wrote:You are making headway......NICE!
And it's almost winter! ;)
Garnet
Posts: 3108
Joined: Tue Aug 03, 2010 6:24 pm
Location: Victoria BC Canada

Re: seat-pan progression

Post by Garnet »

justoneoftheguys wrote:
Garnet wrote:You are making headway......NICE!
And it's almost winter! ;)
Soooo.... is that cross thread degridation..... or cross threaded contamination?
Garnet

Image
Deleted User 287

Re: seat-pan progression

Post by Deleted User 287 »

Garnet wrote:
justoneoftheguys wrote:
Garnet wrote:You are making headway......NICE!
And it's almost winter! ;)
Soooo.... is that cross thread degridation..... or cross threaded contamination?
Nice bike, vanzen. Don't forget the fluids. :oops:
dwerbil
Moderator
Posts: 2873
Joined: Tue Aug 03, 2010 10:58 am
Location: Round Rock, Texas
Contact:

Re: seat-pan progression

Post by dwerbil »

And tightening drain plugs!
Image

Click for pics
04 R1150RT ~ 78 R100/7 ~ 84 RS ~ 93 K1100RS ~ 65 R60/2
Randy in Round Rock
Deleted User 62

Re: seat-pan progression

Post by Deleted User 62 »

Good Stuff! Did or will you have to dimple the tank for bars like that?
User avatar
Ross
Posts: 888
Joined: Tue Aug 03, 2010 10:16 pm
Location: Central Coast NSW Australia
Contact:

Re: seat-pan progression

Post by Ross »

Great looking tail end there.
Me wittle bit of the web........http://rossmz.blogspot.com/
User avatar
vanzen
Posts: 1438
Joined: Mon Aug 09, 2010 2:29 pm
Location: Hidin' in the Hills

dimples

Post by vanzen »

Tim Shepherd wrote:Good Stuff! Did or will you have to dimple the tank for bars like that?
Thanks Tim,

The tank has one dimple from a previous life mishap – a historical reference such as it is.
Clearance, lock to lock, is possible without any further hammering:

Image
Image
Post Reply