Let the bobbing begin.

Discuss all things 1970 & later Airheads right here.
User avatar
Ross
Posts: 888
Joined: Tue Aug 03, 2010 10:16 pm
Location: Central Coast NSW Australia
Contact:

Re: Let the bobbing begin.

Post by Ross »

Slowly working on the seat base and it's padding. Having to go to work gets in the way. Below are shots of how this is shaping up.

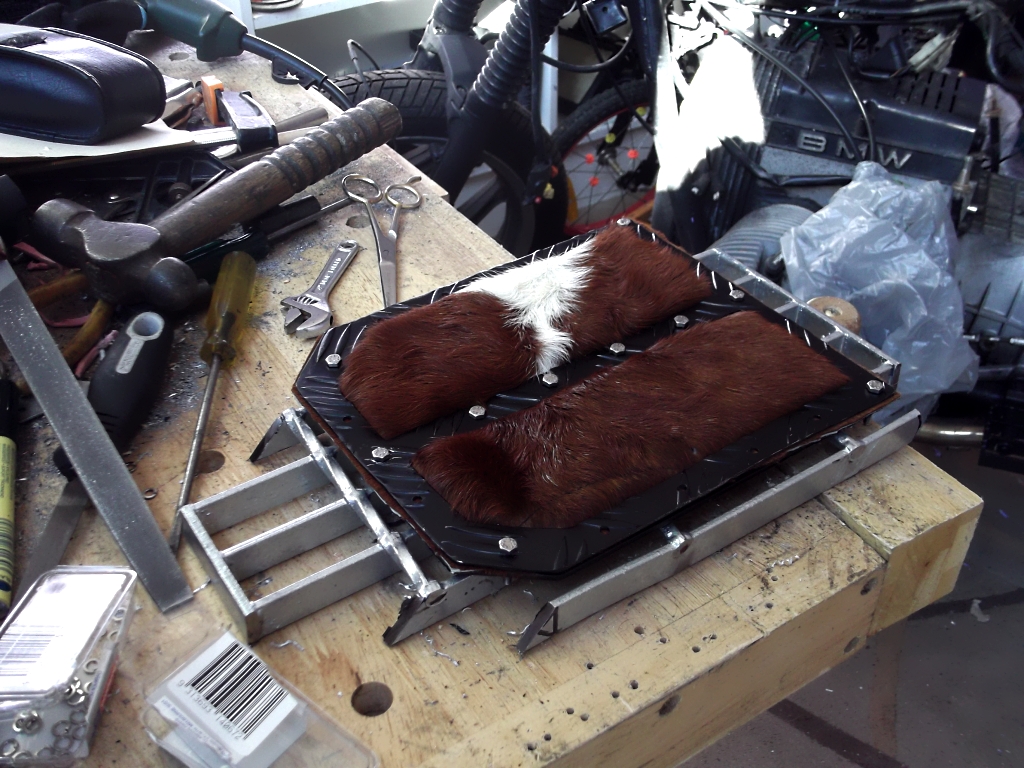
The padding is from an old Yoga mat. The cow hide came from a wonderful lady who makes shaman's drums and medicine bags. She gave me some hide. Thank you Vickie.

So far just cutting and shaping.

Image

Image

Image
Me wittle bit of the web........http://rossmz.blogspot.com/
ME 109
Posts: 7308
Joined: Tue Aug 03, 2010 3:00 am
Location: Albury, Australia

Re: Let the bobbing begin.

Post by ME 109 »

One must keep in mind the ability of one's work to injure oneself in the event of an accident.
No sharp edges!
Sculptures excepted.
Lord of the Bings
User avatar
Ross
Posts: 888
Joined: Tue Aug 03, 2010 10:16 pm
Location: Central Coast NSW Australia
Contact:

Re: Let the bobbing begin.

Post by Ross »

ME 109 wrote:One must keep in mind the ability of one's work to injure oneself in the event of an accident.
No sharp edges!
Sculptures excepted.
Lots of rounding off still to do mate.
Me wittle bit of the web........http://rossmz.blogspot.com/
User avatar
Ross
Posts: 888
Joined: Tue Aug 03, 2010 10:16 pm
Location: Central Coast NSW Australia
Contact:

Re: Let the bobbing begin.

Post by Ross »

Started on the frame that will go over the hide and then be bolted to the sear base to hold all the padding and hide down. This is only the start of the smoothing and shaping. Cut out of tread plate. May be the only bit of tread plate to go onto this build too. Now the file goes to work.

Image

Image

Image
Me wittle bit of the web........http://rossmz.blogspot.com/
User avatar
Ross
Posts: 888
Joined: Tue Aug 03, 2010 10:16 pm
Location: Central Coast NSW Australia
Contact:

Re: Let the bobbing begin.

Post by Ross »

Lots of filing and smoothing edges down have been done today. What seemed like millions of holes drilled. Coat of Satin Black has been applied. Stainless steel nuts and bolts are being used to bolt the plates together over the hide and padding. I am loving how this is shaping up.

Image

Image

Once all the bolts are in, I am short by 2 bolts D!OH, some brackets will be made to mount this to the "grill" base. Then I have to source some scissor springs and a garden gate hinge. The hinge will allow the seat to move up and down. Keeping with the industrial feel and look with the gate hinge.
Me wittle bit of the web........http://rossmz.blogspot.com/
User avatar
Ross
Posts: 888
Joined: Tue Aug 03, 2010 10:16 pm
Location: Central Coast NSW Australia
Contact:

Re: Let the bobbing begin.

Post by Ross »

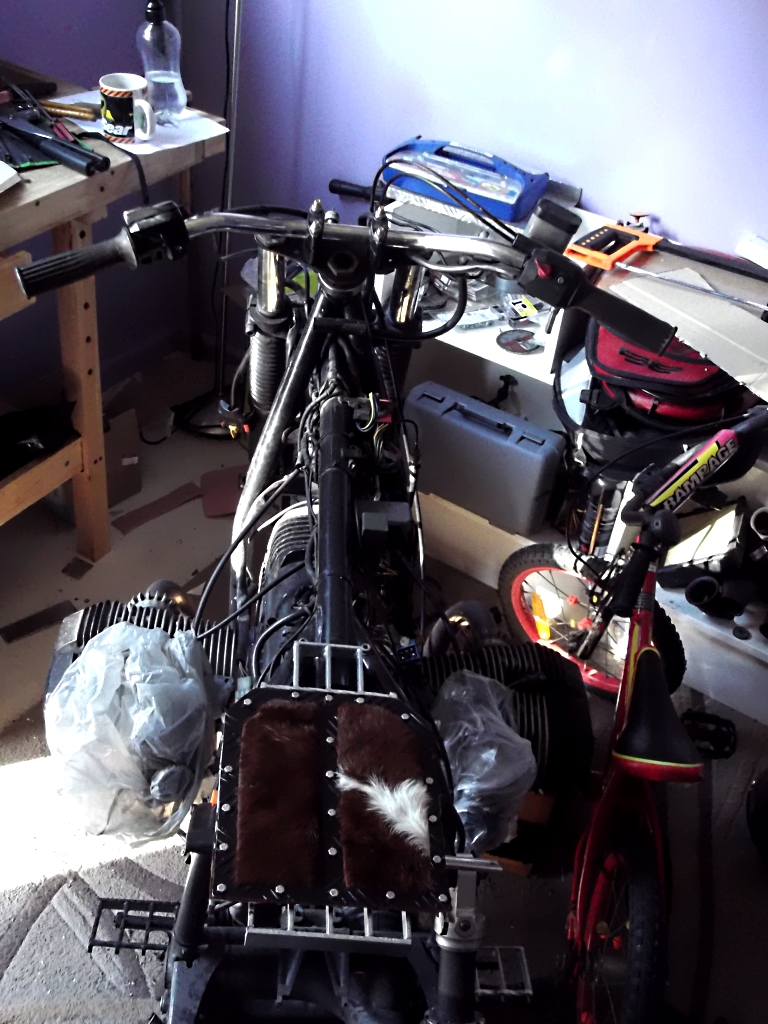
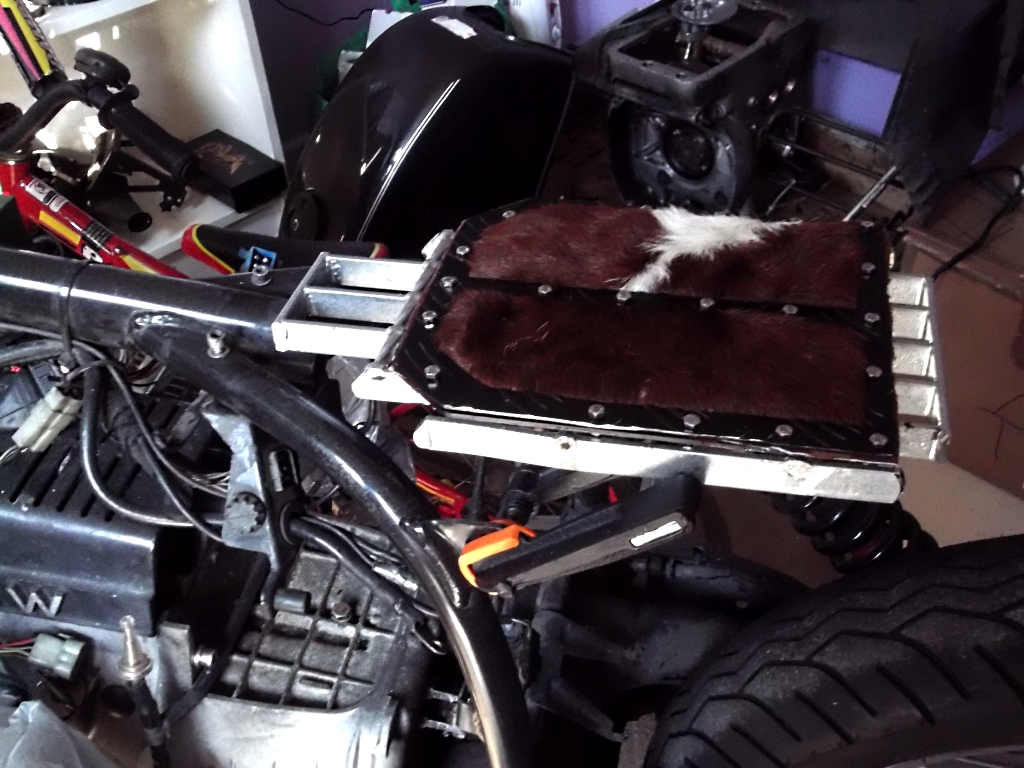
Very narrow to say the least. I have sat on it. Given that the bike will still have its rear shock fitted and the seat will be sprung it should not be too bad. Short runs should be fine.

Image

Image
Me wittle bit of the web........http://rossmz.blogspot.com/
User avatar
Ross
Posts: 888
Joined: Tue Aug 03, 2010 10:16 pm
Location: Central Coast NSW Australia
Contact:

Re: Let the bobbing begin.

Post by Ross »

Thanks to OldGriffo (a mate from BikeMe forums) for the "tanks".

Bit of sizing up and assessing how to mount them. Also will have to make/source a fuel inlet with a cap. Fuel taps will need to be sources and made too. Tanks will be sprayed satin black from spray can.

Image
Image
Me wittle bit of the web........http://rossmz.blogspot.com/
User avatar
twist
Posts: 249
Joined: Sun Jan 16, 2011 9:09 pm

Re: Let the bobbing begin.

Post by twist »

this will, most likely, be a very interesting project and the final product will be very different from anything I've seen. What's next?
User avatar
Ross
Posts: 888
Joined: Tue Aug 03, 2010 10:16 pm
Location: Central Coast NSW Australia
Contact:

Re: Let the bobbing begin.

Post by Ross »

twist wrote:this will, most likely, be a very interesting project and the final product will be very different from anything I've seen. What's next?
Offset headlamp. Mounted off the right hand side of the fuel tank.
Me wittle bit of the web........http://rossmz.blogspot.com/
Post Reply